We’ve started to lay the foundation for an administrative area used to manage shared digital collections. The first layers are the ability to view resources and export usage reports.
The Resources feature allows a full administrator at the district or consortium level to:
- View all resources in the shared collection including those migrated at the district or consortium level.
- Easily delete resources, such as expired subscriptions or outdated titles, to remove them from discovery in all VIA accounts where the titles are shared.
- View all VIA accounts where a resource is shared and see its status within those accounts.
The Reports feature allows a full administrator at the district or consortium level to export a report with title and usage information for their shared collection over a desired date range.
Who can access Shared Collection Management?
To access this view, users must have a Mackin.com account that has been connected to Mackin’s internal district or consortium account. Please contact eservices@mackin.com with the following information for any users who need administrative access to a shared collection.
- Contact’s first and last name
- Email address
- Name of the district/consortium or shared collection
How will Shared Collection Management be accessed?
For users with permission, a new menu category called “Type” will be present when selecting a VIA account in the existing MackinVIA Administrator portal. Please note: The “Type” category will only be available from the menu in the new Administrator site (Dashboard, Resources, Assignments, Class Sets, Usage, and all Settings except Home Page)
Choose “Districts/Consortia” as the type and then pick the desired location. Some administrators may have access to multiple collections.

View Resources
Administrators can view all resources in the shared collection including those migrated at the district or consortium level. Search for a resource by performing a keyword search using the Filter Results box or by selecting one or more of the Advanced Search filters. View options include All, Active, and Expired. Please note: Resources cannot be deactivated at this level.

Delete a Resource
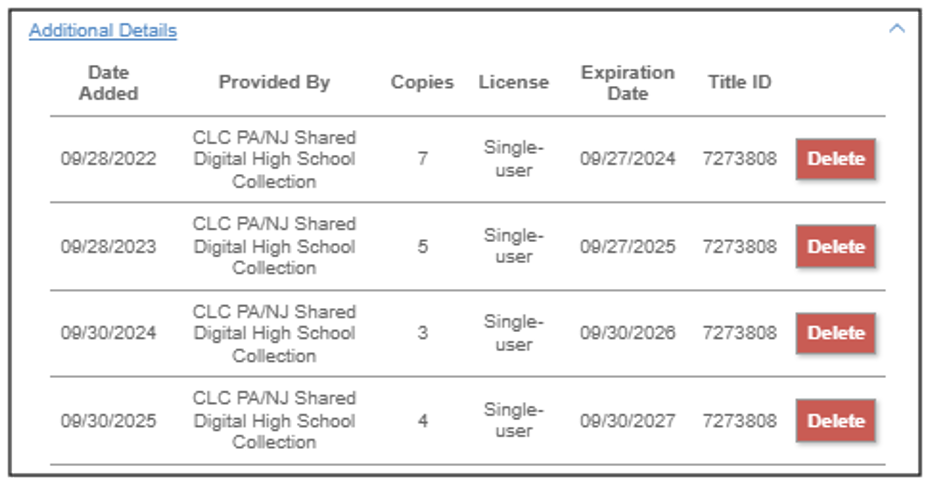
To delete a resource, open the Resource Details and scroll to the bottom to expand the Additional Details section. Click on the Delete button next to the desired title and confirm the action. Deleting a resource will remove it from discovery in all VIA accounts where it is shared.

To view deleted resources, go to Resources > Deleted Resources. Administrators can view all resources deleted from the shared collection and restore them if desired.

View Shared Accounts
Administrators can view all VIA accounts where a resource is shared. To view the accounts, click on the desired title, open the Resource Details page, and expand the Additional Details section at the bottom of the screen.

A list of the shared VIA accounts will display along with the title’s status (active, inactive, expired, or deleted) within those accounts.

Export a Usage Report
Administrators can export a report with title and usage information for their shared collection over a desired date range. Data includes details such as date added, title, author, publisher, interest level, license/access type, subscription information, resource type, copies available, and resource URL, as well as the following statistics:
- Resource Views: Number of times the resource was viewed (“Open Now” clicks)
- CkOs RptPeriod: Number of times the resource was checked out
- Requests RptPeriod: Number of times the resource was requested
- Average Request_WaitTime: Average time in the request queue before the resource is available to check out (Example: 2 Days 12:43:00 (Hours : Minutes : Seconds))

Notes:
- The date range is limited to a 12-month period. The start and end dates will automatically adjust to account for it.
- The export will be a CSV file. If formatting adjustments are desired, please save it as an Excel file.
- The account name and date range will be included in the file name.
Provided by Filter
First, log into your MackinVIA Administrator account with your Mackin.com email address and password.
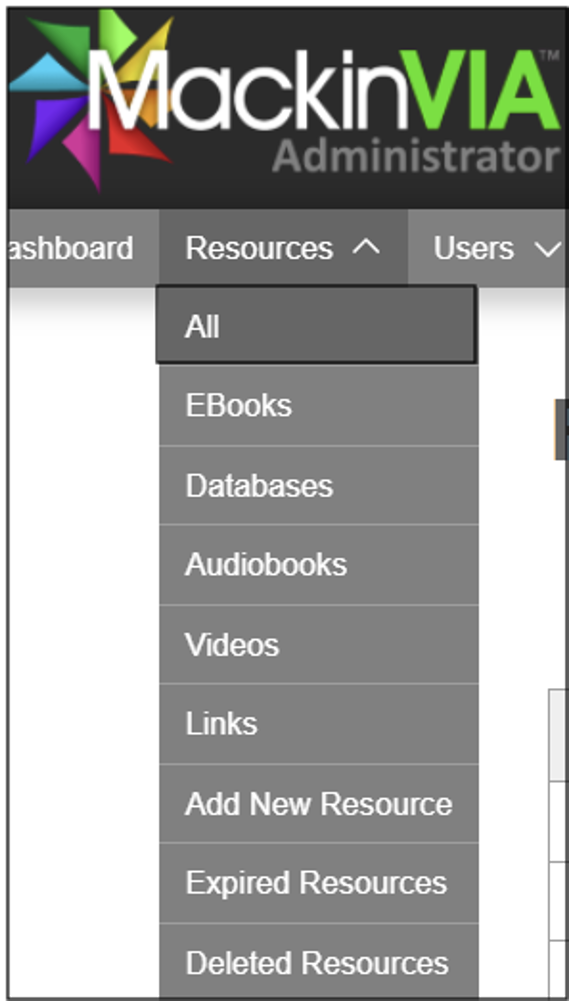
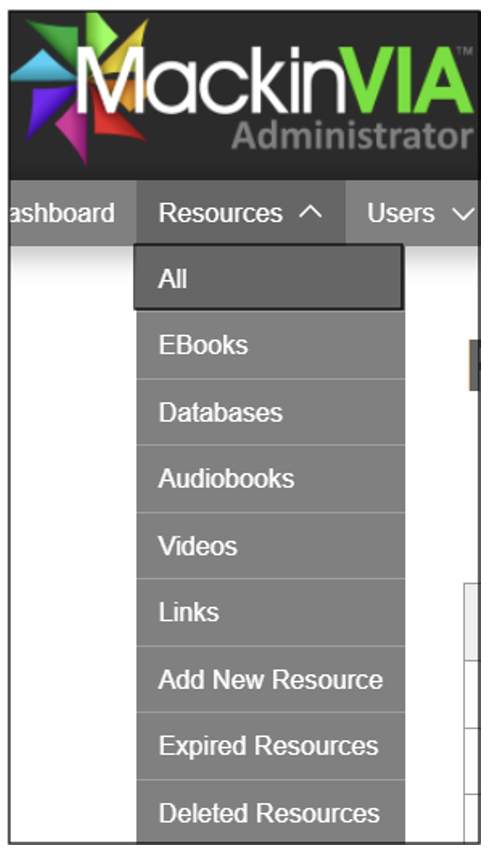
To easily identify titles that were purchased by your shared digital collection, choose Resources > ALL (make sure you select the correct VIA if there is more than one account).
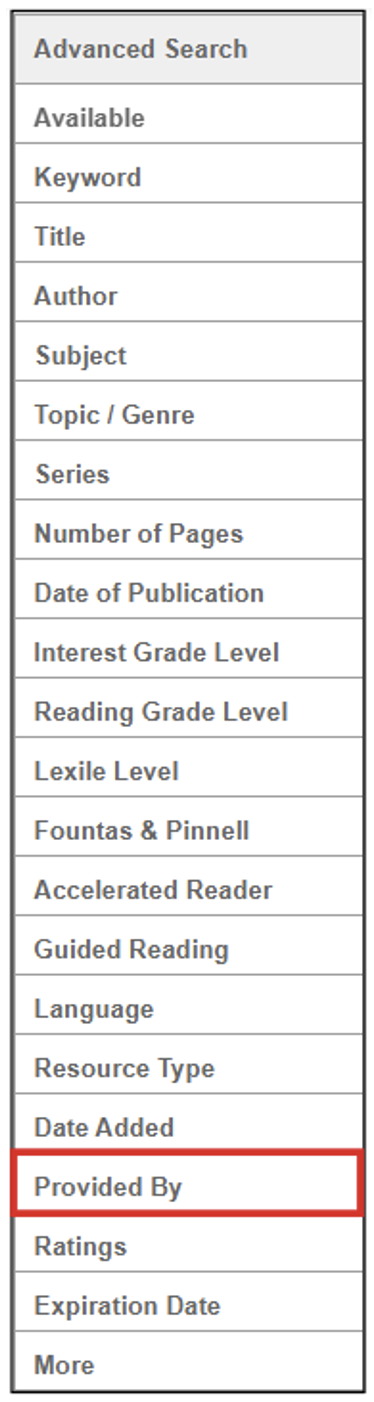
Under Advanced Search select Provided By.
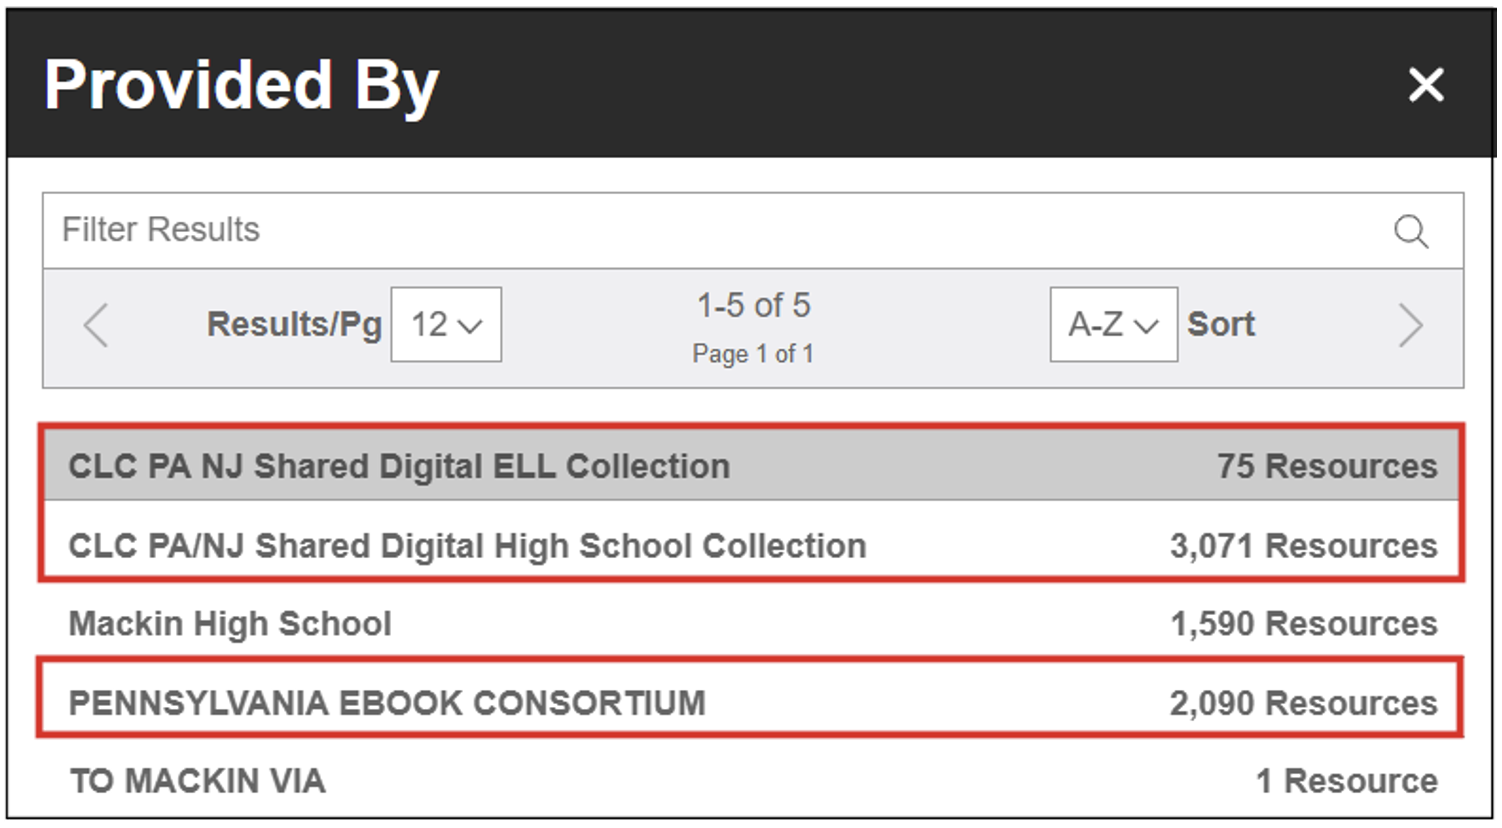
Look for terms like shared digital collection or consortium. (You may see variations in the Provided By name for your consortium if you have been a long-time participant. For example, older CLC titles are provided by Pennsylvania eBook Consortium. Newer CLC titles are providedby CLC PA/NJ…)
Usage Reports & Expired Resources
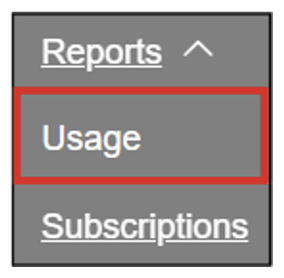
To easily identify expired resources, log in to your administrative account. Choose Reports > Usage.
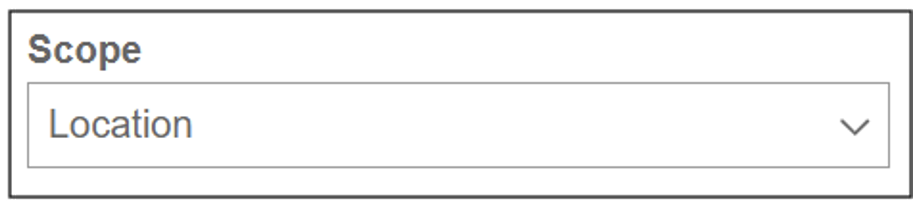
Adjust the parameters as you like, although default settings work fine here. Make sure Scope is set to Location
Select Export or View Report.

Sort by Status. (If you have a lot of titles, Export the report and use Excel sorting to identify only EXPIRED resources. The browser report only allows users to sort Status by A-Z or Z-A so those with an EXPIRED status get buried in the middle.)

(Please note, the Subscription Report separates out all the renewals into separate line items. That report may show a title as being Expired and also as being Current. The Usage Report combines multiple purchases of the same title that are from the same publisher and vendor and are the same item type into one line item on the report. If it shows as Expired on the Usage Report, there are no copies of that title + publisher + vendor + item type currently available in your VIA.)
Combined Licenses & Resource Details
If you want to see when a specific title is going to expire or a purchase history of a title, log into your MackinVIA administrator account.
Choose Resources > ALL.
Once you have found the title you are looking for, click on the title name. This will pull up the Resource Details.

Scroll down to the bottom of the Resource Details page to the Additional Details section. Press the down arrow to expand this section.
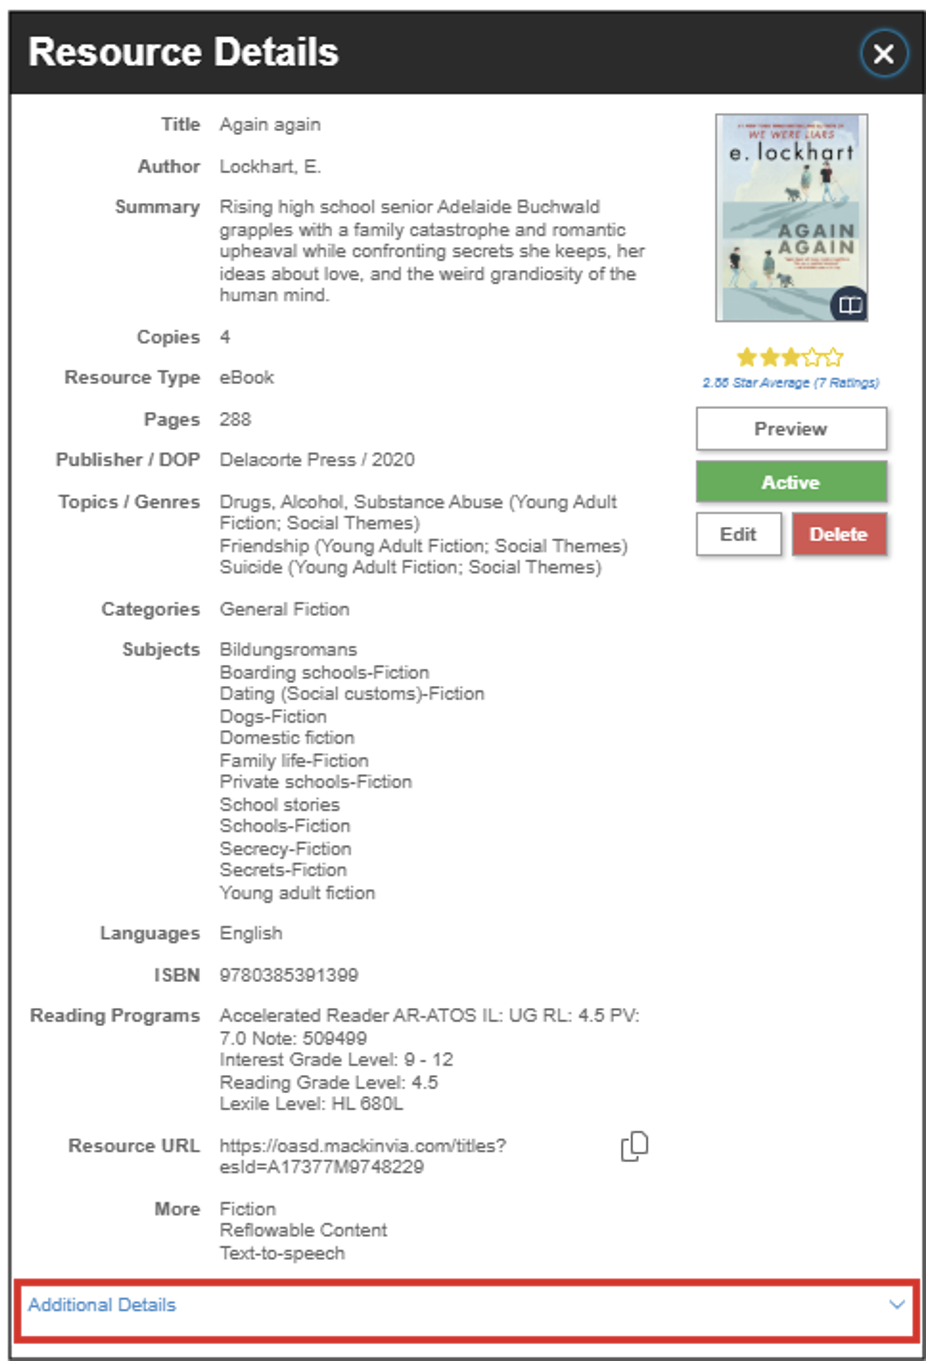
The Additional Details section will show all purchases of the title, including Date Added, Provided By, License (either multi-user or single-user), Expiration Date and Title ID.